Well yeah, it could be something like that.
Here's another example:
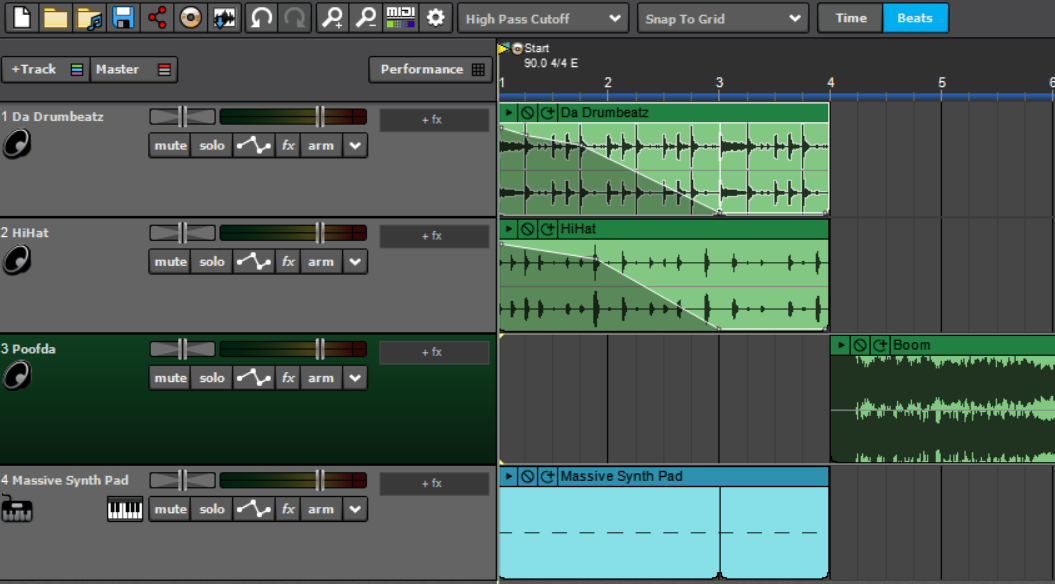
- Bangin.png (125.92 KiB) Viewed 4884 times
https://drive.google.com/open?id=1FA7pZ ... cBAXmbEb5A

But back to seriousness, part of the original discussion this idea came from was a comment on possibly using this function as a HP (etc.) filter for mixing.
The biggest issue with that is having no indication of the frequencies or slopes of the filter. So I did a little more investigation.

One thing I discovered is that I had previously dismissed this from results I got using two different spectral graphs on two very different scales. Oops.
My current go to for the job is capable of aggressive slopes, as in this 50 hz HPF example at 24 dB per octave:
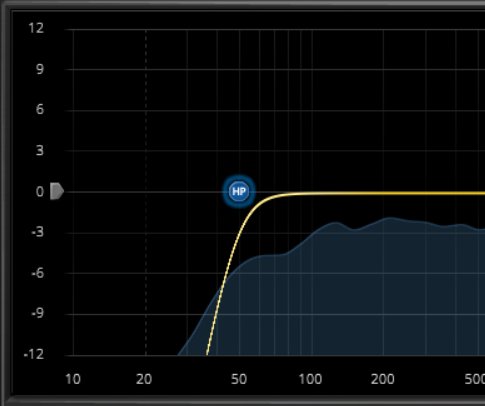
- HP filter 2 50 Hz.png (35.19 KiB) Viewed 4884 times
I cant definitively say, but it appears the Mixcraft High Pass Cutoff filter has about a 12 Db per octave slope in my testing, which is still useful. (As previously shown, the Low Pass Cutoff filter appears to have a steeper slope.)
And it looks like the frequency of the filter isn't linear. That is to say a cut setting of 20 isn't twice the frequency of a setting of 10 and so forth.
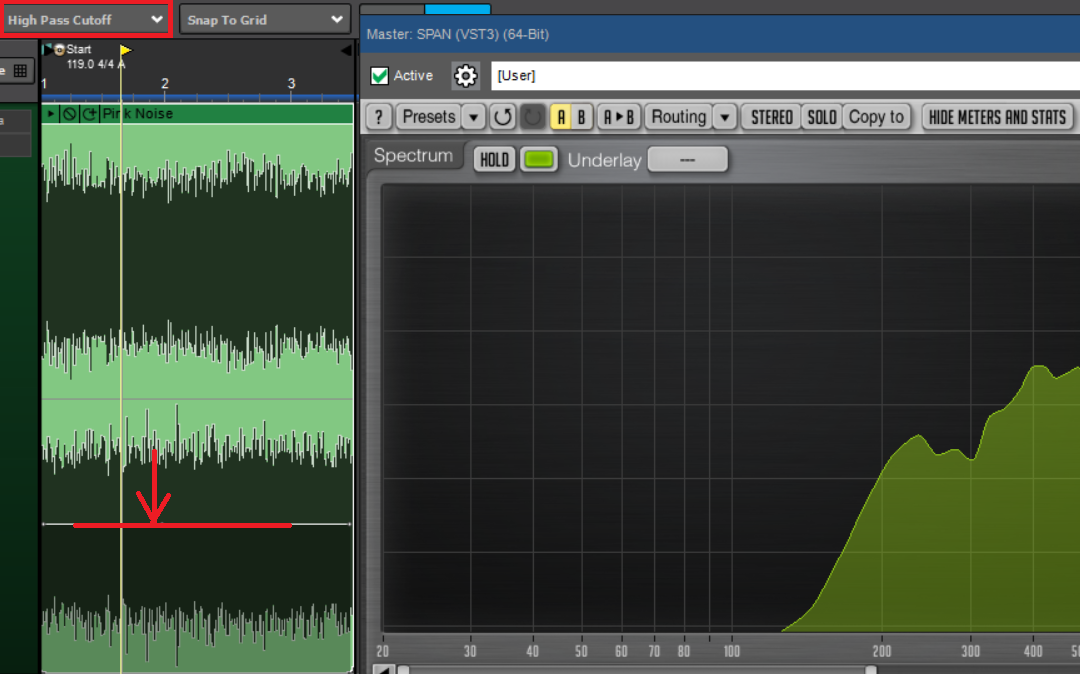
But experimenting, I found that a setting of 12 or 13 is roughly equivalent to a 50 hz HPF at 12 dB per octave:
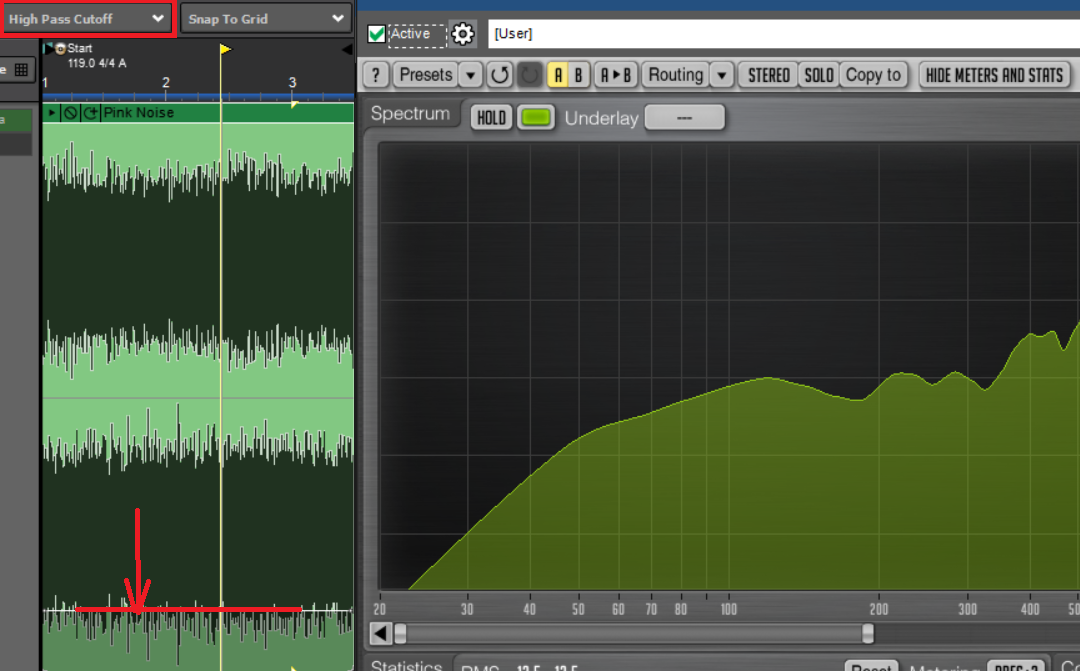
- HP filter 50 Hz.png (271.74 KiB) Viewed 4884 times
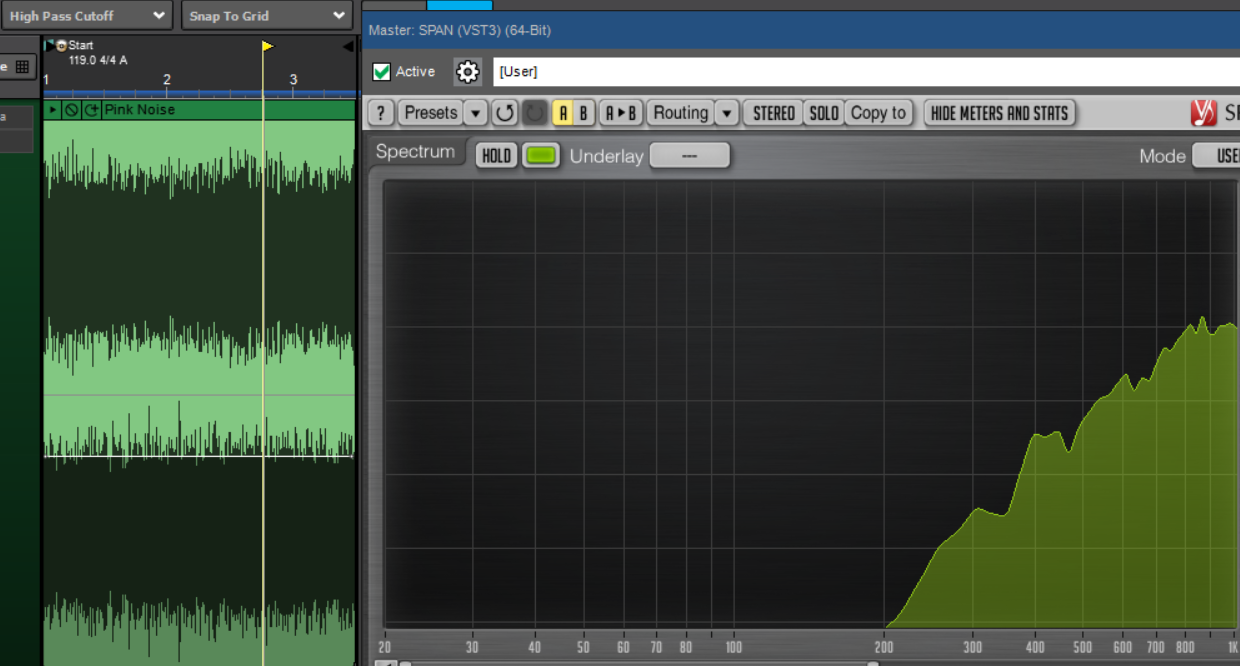
Next, a setting of about 20 seems to correlate to 100 hz:
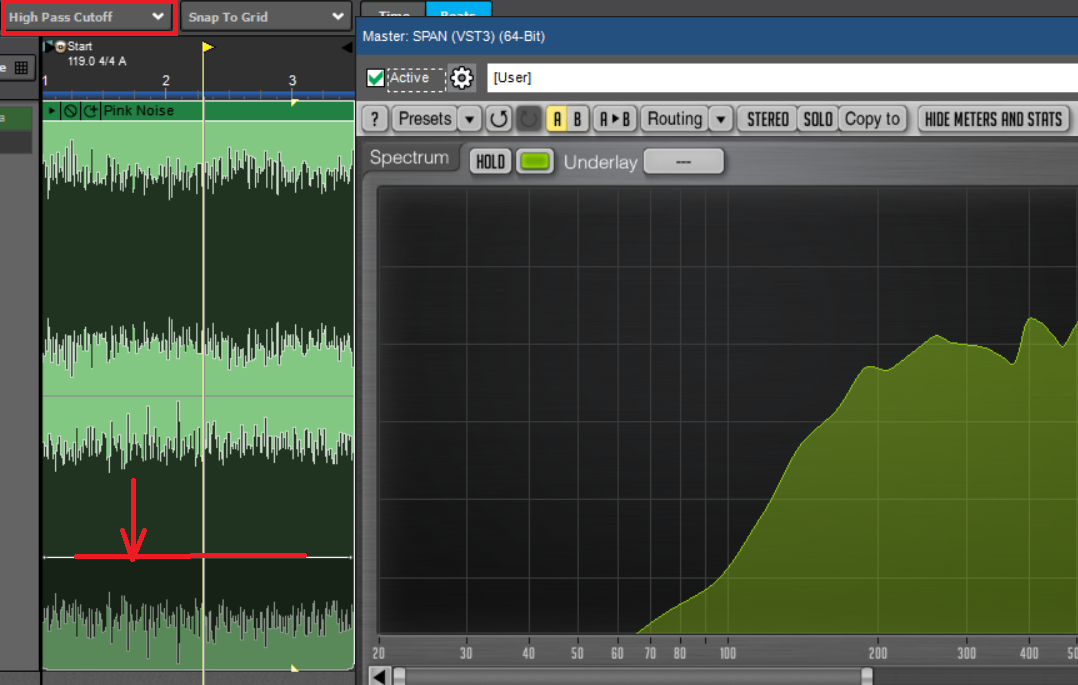
- HP filter 100 Hz.png (266.93 KiB) Viewed 4884 times
And 150 hz seems to be around 28:
- HP filter 150 Hz.png (261.2 KiB) Viewed 4884 times
Rolling the filter setting up to around 40 rolled off frequencies below about 500 hz.
- HP filter 500.png (297.3 KiB) Viewed 4884 times
Note that the LP cutoff works inversely.
Conclusion: While not an ideal solution IMO, this could indeed be used as a functional HP or LP filter.

